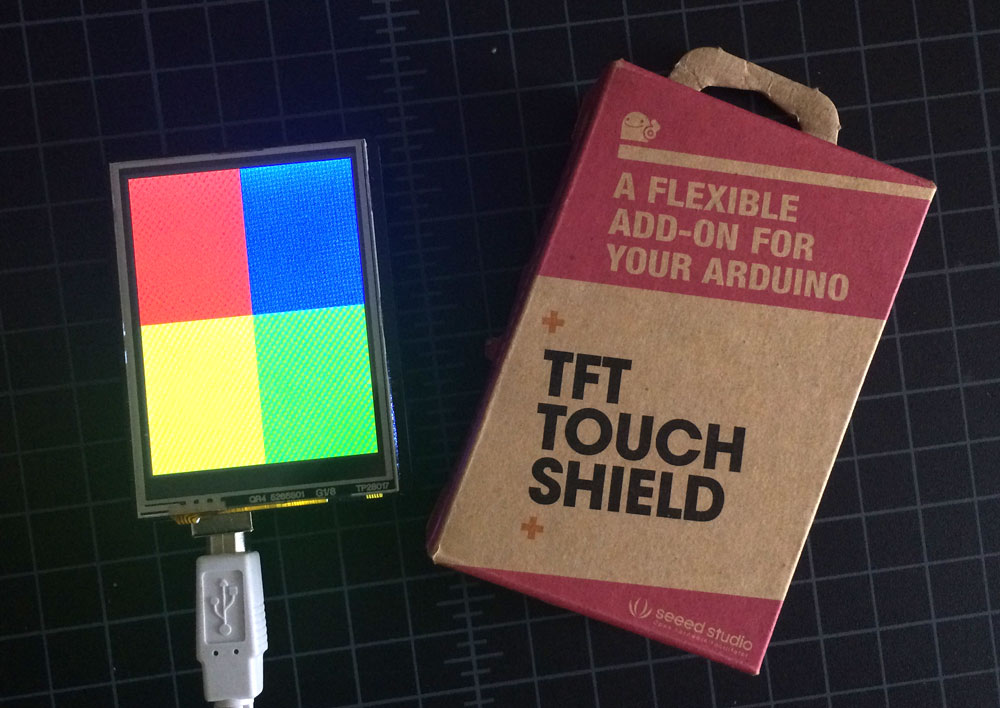
I created a very bare bones framework for building a touch screen combination puzzle using an Arduino UNO & SeedStudio TFT shield. I tried to keep it as simple as possible for beginners.
Skill Level : Beginner-Intermediate (no soldering or wires!)
Parts Needed:
- Arduino Uno ($21.95) - http://amzn.to/1KeInam
- SeedStudio TFT Touch Shield ($23.99) - http://amzn.to/20YuiSj
- Arduino Programmer ($4.99) - http://amzn.to/1Qb8jpI
- optional - SD Card (if you want to use images) - http://amzn.to/2408HeM
Total cost: $50.93
What is TFT?
"A thin-film transistor (TFT) liquid crystal display is a variant of a LCD that uses thin-film transistor technology.."
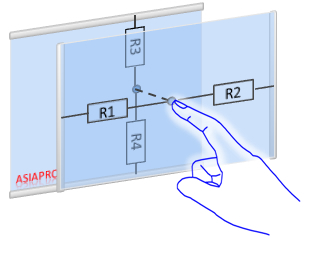
How does it read touch?
It reads touch by reading resistance from x & y coordinates.
Step 1 - Install Libraries.
In the Arduino software we need to install a few libraries. These libraries handle a lot of the heavy lifting--enabling the correct pins for the shield, as well as the algorithms to determine touch location.
Download & unzip the following libraries:
- TFT Touch Shield Library - https://github.com/Seeed-Studio/TFTTouchShield_V2/archive/master.zip
- Seed Studio Touch Driver - https://github.com/Seeed-Studio/TouchScreenDriver/archive/master.zip
Find the directory into which the Arduino IDE and supporting files have been installed. This may be '/usr/local/arduino' or '/usr/share/arduino' or one of many OTHER possible choices depending on your operating system. (mine was in User/{computer name}/Documents/arduino )
Still confused? Read more here: https://learn.adafruit.com/adafruit-all-about-arduino-libraries-install-use/arduino-libraries
Step 2 - Code
Copy the following code & upload it onto your UNO.
//include libraries
#include <SeeedTouchScreen.h>
#include <TFTv2.h>
#include <SPI.h>


int combination[] = {1, 2, 3, 4}; //This is the combination order.  Do not use the same button twice in a row
int combinationLength = 4; //defined length of combination
int stepLocation = 0; //When we step through the combination we store our current status
int lastPressed = 0; //Store the last pressed value to avoid false positives

#define YP A2   // must be an analog pin, use "An" notation!
#define XM A1   // must be an analog pin, use "An" notation!
#define YM 14   // can be a digital pin, this is A0
#define XP 17   // can be a digital pin, this is A3


#define TS_MINX 116*2
#define TS_MAXX 890*2
#define TS_MINY 83*2
#define TS_MAXY 913*2
#define WIDTH 240
#define HEIGHT 320
#define HWIDTH 120
#define HHEIGHT 160


// For better pressure precision, we need to know the resistance
// between X+ and X-
// The 2.8" TFT Touch shield has 300 ohms across the X plate
TouchScreen ts = TouchScreen(XP, YP, XM, YM);

void setup(void) {
  Serial.begin(9600);
  TFT_BL_ON;      // turn on the background light
  Tft.TFTinit();  // init TFT library
  defaultScreen();
}

void loop(void) {
  // a point object holds x y and z coordinates
  Point p = ts.getPoint();
  p.x = map(p.x, TS_MINX, TS_MAXX, 0, 240);
  p.y = map(p.y, TS_MINY, TS_MAXY, 0, 320);

  // we have a minimum pressure we consider 'valid'
  if (p.z > __PRESURE) {

    //Define hit box areas
    if (p.x > 0 && p.x < WIDTH / 2 && p.y > 0 && p.y < HEIGHT / 2) {
      //red button pressed
      Serial.println("red pressed");
      comboCheck(1); //we pass the number 1 into combo check to see if it's a match
    }
    else if (p.x > 0 && p.x < WIDTH / 2 && p.y > HEIGHT / 2 && p.y < HEIGHT) {
      //yellow button pressed
      Serial.println("yellow pressed");
      comboCheck(2); //we pass the number 2 into combo check to see if it's a match
    }
    else if (p.x > WIDTH / 2 && p.x < WIDTH && p.y < HEIGHT / 2 && p.y > 0) {
      //blue button pressed
      Serial.println("blue pressed");
      comboCheck(3); //we pass the number 3 into combo check to see if it's a match
    }
    else if (p.x < WIDTH && p.x > WIDTH / 2 && p.y > HEIGHT / 2 && p.y < HEIGHT) {
      //green button pressed
      Serial.println("green");
      comboCheck(4); //we pass the number 4 into combo check to see if it's a match
    }
  }

  delay(50);

}

//Step Through defined combination
void comboCheck(int number) {
  //See if button pressed is the correct one in combination
  //number is the numerical representation of a color
  if (number == combination[stepLocation] && number != lastPressed) {
    //correct press
    lastPressed = number;
    stepLocation++; //increment step
    if (stepLocation >= combinationLength) {
      //end of combination show success message
      stepLocation = 0;
      lastPressed = 0;
      success();
    }
  }
  //fail & prevent button holding issues
  else if (number != lastPressed) {
    //fail
    stepLocation = 0;
    lastPressed = 0;
  }
}

//When user presses correct combination wipe screen & write message
void success() {
  Tft.fillScreen(0, WIDTH, 0, HEIGHT, BLACK); //Draw a black background
  Tft.drawString("Flight: 815", 25, 190, 2, WHITE); //line 1 text
  Tft.drawString("4,8,15,16,23,42", 25, 220, 2, WHITE); //line 2 text
  delay(5000); //show the message for 5 seconds
  defaultScreen();
}

//Combination screen user sees.
void defaultScreen() {
  Tft.fillScreen(0, WIDTH / 2, 0, HEIGHT / 2, RED); //red box
  Tft.fillScreen(0, WIDTH / 2, HEIGHT / 2, HEIGHT, YELLOW); //yellow box
  Tft.fillScreen(WIDTH / 2, WIDTH, HEIGHT / 2, 0, BLUE); //blue box
  Tft.fillScreen(WIDTH, WIDTH / 2, HEIGHT / 2, HEIGHT, GREEN); //green box
}
How do I update the messaging?
In the success() function:
Tft.drawString.drawChar(Message, X Position,Y Position,font size, Color
  Tft.drawString("**Line 1 Message**", 25, 190, 2, WHITE); //line 1 text
  Tft.drawString("**Line 2 Message**", 25, 220, 2, WHITE); //line 2 text
How do I change the combination?
Each square has a numerical representation. Red= 1, Yellow= 2, Blue= 3, Green= 4. The combination can be as long or as short as you like. To update the existing pattern of red, yellow, blue, and green, you will need to update the combination variables.
Example:
int combination[] = {1, 2, 3, 4, 2, 3, 4};
int combinationLength = 7; //defined length of combination
Reminder: do not use the same key twice in a row, i.e. {1, 2, 2, 3, 4}
How do I replace buttons with custom images?
See this article: Seed Studio TFT Display Images from the SD Card
Documentation
There is plenty more you can do with the TFT Read the documentation here
Like the TFT Shield? Check out my next DIY https://tomknabe.com/diy-escape-room-puzzle-arduino-countdown-timer/
More Questions or requests? comment below!
Feel free to fork or contribute on GitHub!
https://github.com/knabe/Escape-Room-Touch-Screen-Puzzle